Basic Ruby Tutorials: 01 | 02 | 03 | 04 |
Instructions: open this text file and a.) copy and paste code into the Atom.io code editor and save as test3.rb
, or b.) copy and paste code into a TextEdit file in your learnRuby
directory and save as test3.rb
- remember to select Format => Make Plain Text. Or you can copy and paste into your Ruby file using the code below.
Code section below is stand-alone.
Copy and paste this code into a new .rb file:
# START COPY AND PASTE HERE: RUBY code example
# each section below can be run by itself
# SECTION 1 Comments and character formatting
# single-line comments start with the pound sign #
# everything in this line is ignored. no code in this line is processed
# each line usually has one statement (or condensed statement)
# no semicolon is needed at end of a line
# for 2 ruby statements on one line ; separate them with a semi-colon like this line
# brackets { } enclose Ruby formulas, methods, series of commands or data
# Initialize a variable = name a variable and set initial value
myFirstName = hermione
# initialize var
myLastName = granger
# initialize var
puts myFirstName.capitalize # print var and capitalize
puts myLastName.upcase # print var and upper case
puts myLastName.length # print var length
puts # prints empty line for code readability
puts
# end section 1
# END COPY AND PASTE HERE
Do not copy this part. Note: Each section contains stand-alone code. After copying and pasting the code above, you have the option to save and run the new Ruby .rb code above in a command terminal window using the step 5 instructions. Then keep on adding code for each section below and running the file.
Code section below is stand-alone.
Copy and paste this code under code above:
# START COPY AND PASTE HERE
# SECTION 2 Simple User Input
puts USER INPUT
# USER INPUT syntax-format: gets.chomp.nextParameter
# print same as puts except no carriage return (no new line)
print Please enter your first name:
userInput = gets.chomp.capitalize; # initialize user input var
print Please enter your last name:
;
lastName = gets.chomp.capitalize # initialize user input var
puts Your name is #{userInput} #{lastName}!
; # print to screen
puts # prints empty line for code readability
puts
# end section 2
# END COPY AND PASTE HERE
How to initialize a simple hash map (data lookup structure) with keys and values using the colon : syntax. A Ruby hash index is created with arbitrary keys of any object type. The hash order is by either key or value, typically not input order.
Code section below is stand-alone.
Copy and paste this code under code above:
# START COPY AND PASTE HERE
# SECTION 3 Initialize hash map
# initialize a simple hash map (lookup structure) with keys and values
# hash is typically good for random data. hash does not categorize-assign items with an index number
# hash can be easily converted to array (with zero number indexing format)
# hash is created with arbitrary keys of any object type, alphabetic, number, symbol
# hash order is by either key or value, typically not input order
# ========================
# hash initialization and item entry are all condensed into one line/unit below
# initialize fruits hash using following syntax: hashName = { }
# specify hash items using colon syntax, key : value
# mango is a key, 26 is a value
fruits = { mango: 26, kiwi: 48, coconut: 9 }
# print all fruits keys and values to terminal
puts ALL FRUITS KEYS (Names)
# prints title
puts fruits.keys # print all hash keys
puts ALL FRUITS VALUES (Amounts)
puts fruits.values # print all hash values
# add new item to fruits hash
# add pineapple as key and 17 as value
# syntax is hashName[:key] = value
fruits[:pineapple] = 17
puts ALL FRUITS KEYS ADD PINEAPPLE (Names)
puts fruits.keys
puts ALL FRUITS VALUES ADD PINEAPPLE (Amounts)
puts fruits.values
puts # prints empty line for code readability
puts
# end section 3
# END COPY AND PASTE HERE
Copy and paste this code under code above:
# START COPY AND PASTE HERE
# SECTION 4 Initialize hash map with => syntax
# initialize hash using following syntax: hashName = { }
# initialize hash items using hash-rocket => syntax, food1 => chlorella
# food1 is a key, chlorella is a value
superfoods = {
food1
=> chlorella
, # Add items with => syntax
food2
=> nori
,
food3
=> bee pollen
,
food4
=> sauerkraut
,
food5
=> kimchi
}
puts SUPERFOODS HASH food3 IS:
# print title
puts superfoods[food3
]; # print value for key food3
puts ALL SUPERFOODS KEYS
# print title
puts superfoods.keys # print all hash keys
puts ALL SUPERFOODS VALUES
puts superfoods.values # print all hash values
puts # prints empty line for code readability
puts
# end section 4
# END COPY AND PASTE HERE
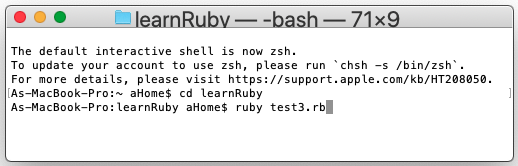
Run the test3.rb file in the command window just as in tutorial 1: